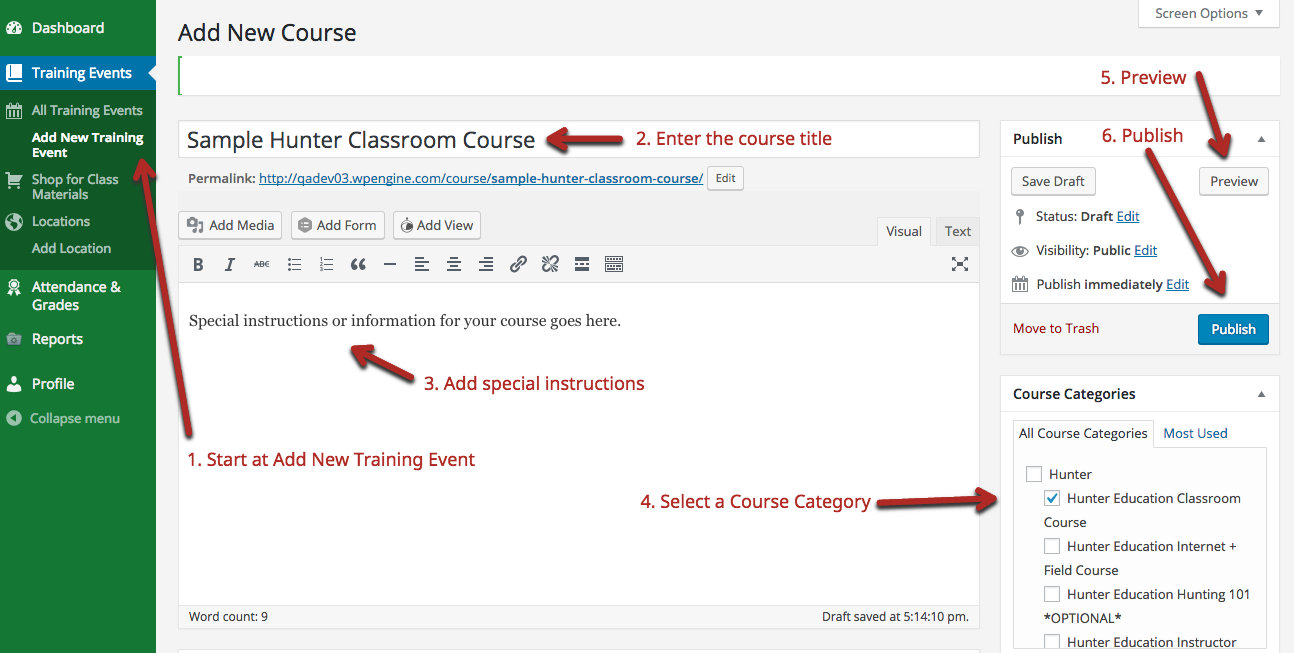
Steps to Add a new Course
Create Courses so that students can register for your live classes. Courses can be either Public (the default): searchable by any user in the Hunter and Boater Education online registration system, or Private: only available if you give your students the URL or link to the course. Courses contain details about the date, time, location, and description of your class.
NOTE: You must Add a Location before you can complete all of the steps to add a Course, including Live Lesson Information. See Adding a Location.
Follow these steps to create a new Course:
- Go to Courses on the left navigation menu. Select Add New Course.
- Enter a Title for your course, in the field that says “Enter a title for this course here.”
- Note that the “Permalink” for your course will automatically update. This is the direct URL for your course. You will only need this URL if you are creating a Private course.
- Enter special instructions or information for your course in the large empty box below the title. This information will appear on the class detail page, to the right of the About the Course information.
- Select a Course Category that matches the type of class you are creating. Your course category options are as follows:
- Hunter
- Hunter Education Classroom Course
- Hunter Education Internet + Field Course
- Hunter Education Hunting 101 *OPTIONAL*
- Hunter Education Instructor Course
- Boater
- Boater Education Classroom Course
- Boater Education Instructor Course
- Hunter
- Preview your course by selecting Preview. The course detail page will open in a new window. Note that information about location, date, time, and available seats will not yet be available in the preview. You will add these in Live Lesson Information (see Entering Live Lesson Information).
- Publish your course by selecting Publish, or select Save Draft to save your progress and enter Live Lesson Information.
- To complete the course details, see Entering Live Lesson Information.

